RINalyzer Tutorials
Tutorials for Cytoscape 3.x
Tutorials for Cytoscape 2.x
Download the video tutorial here or watch it online now. Detailed instructions are given below.
In the following, screenshots for each step appear when hovering the mouse over (image). If you cannot see the whole image, you can use the keyboard arrows to move to the right or to the bottom while holding the mouse over the image.
In this tutorial, we assume that you have loaded a RIN into Cytoscape and opened the corresponding PDB structure in UCSF Chimera.
Create node sets (residue selections)
- In Cytoscape, go to Plugins → RINalyzer → Manage Node Sets (image
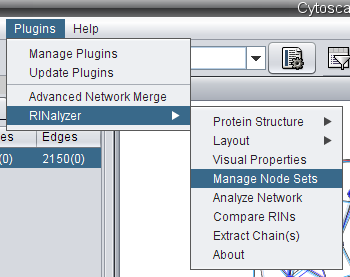 ) and a new panel for node sets will appear in the Cytoscape's Control Panel.
- In UCSF Chimera, go to Select → Chain → A (image
 ). Now, all residues in chain A are selected (indicated by green color) and the corresponding nodes in Cytoscape are also selected (yellow) (image
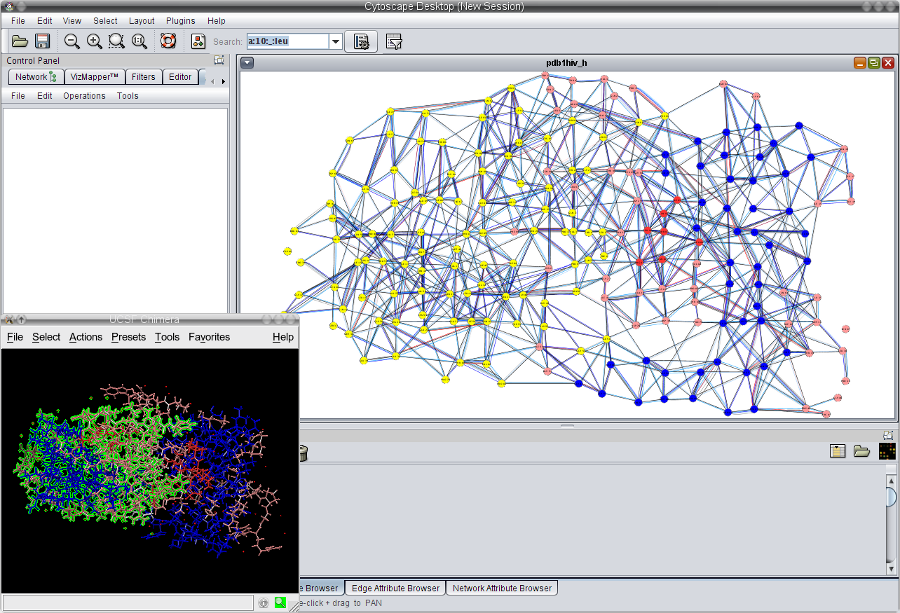 ).
).
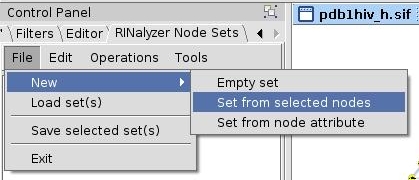
- In the RINalyzer Node Sets panel in Cytoscape, go to File → New → Set from selected nodes (image
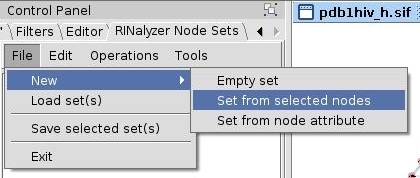 ).
).
- Enter a name for the set to be created, e.g., Chain A, in the text field and click OK (image
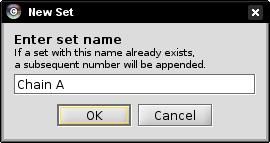 ).
).
- In UCSF Chimera, go to Select → Chain → B. This will change the current selection in both viewers (image
 ).
).
- In the RINalyzer Node Sets panel in Cytoscape, go to File → New → Set from selected nodes (image
 ).
).
- Enter a name for the set to be created, e.g., Chain B, in the text field and click OK (image
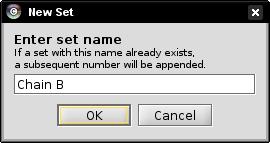 ).
).
Perform set operations
- Select both sets (by left-clicking and pressing the Ctrl key) and go to Operations → Union (image
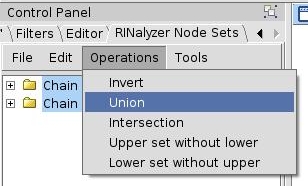 ). This action will create a new set, which is the union of the selected sets.
- Enter a name for the set to be created, e.g., All nodes, in the text field and click OK (image
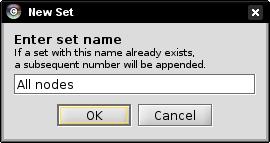 ).
).
- Right-click the set All nodes and go to Select nodes (image
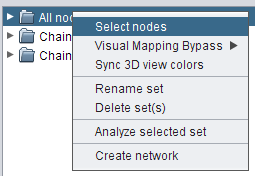 ), in order to select all set nodes in the network view (image
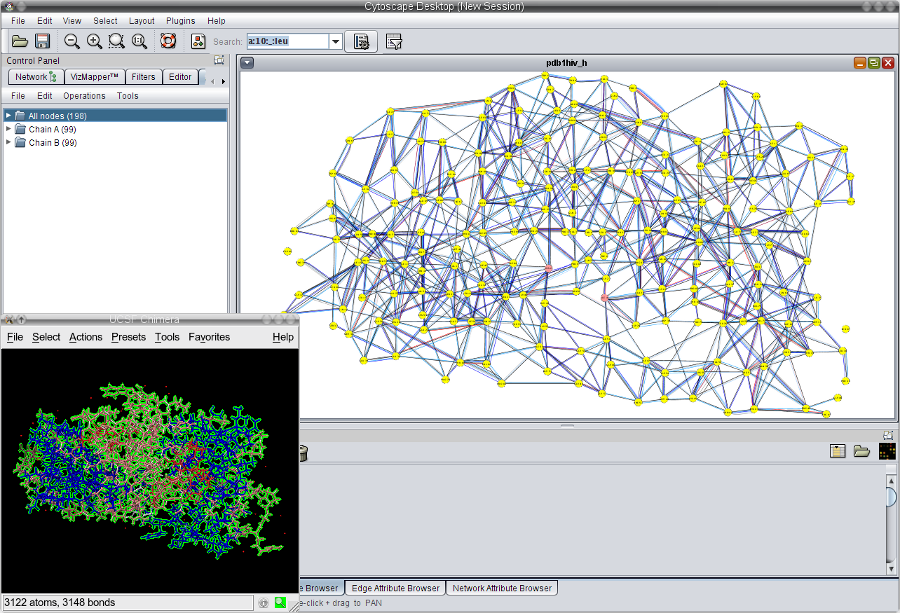 ).
).
- Right-click the set All nodes and go to Delete set(s), in order to delete this set (image
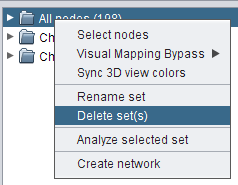 ).
).
- Click somewhere in the Network View window in order to clear the current selection.
Color nodes in a set
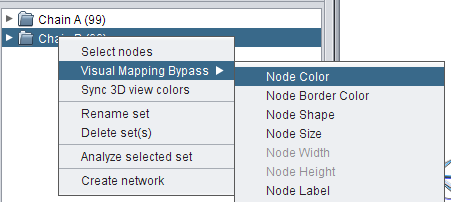
- Right-click the set Chain A and go to Visual Mapping Bypass → Node Color (image
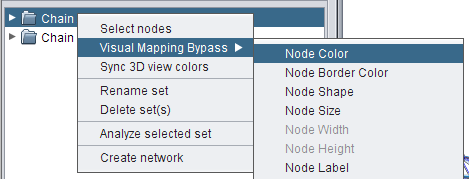 ).
).
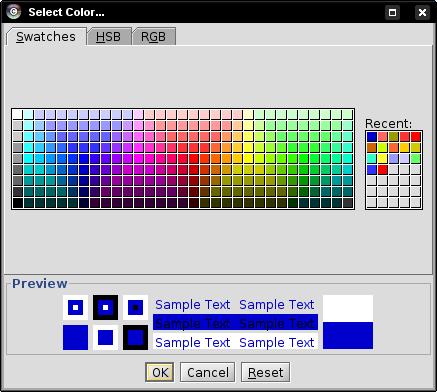
- Select a color and click OK. This will color all nodes in the set in the selected color (image
 ).
).
- Right-click the same set again and go to Sync 3D view colors (image
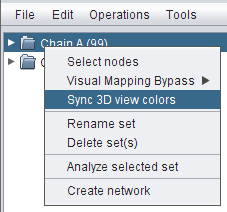 ) to color the corresponding residues in Chimera with the same color.
- Do the same for the set Chain B (image 1
 , image 2
 , and image 3
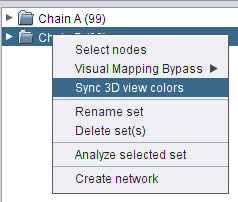 ).
).
- Now, the network view and the 3D view should look as in this image
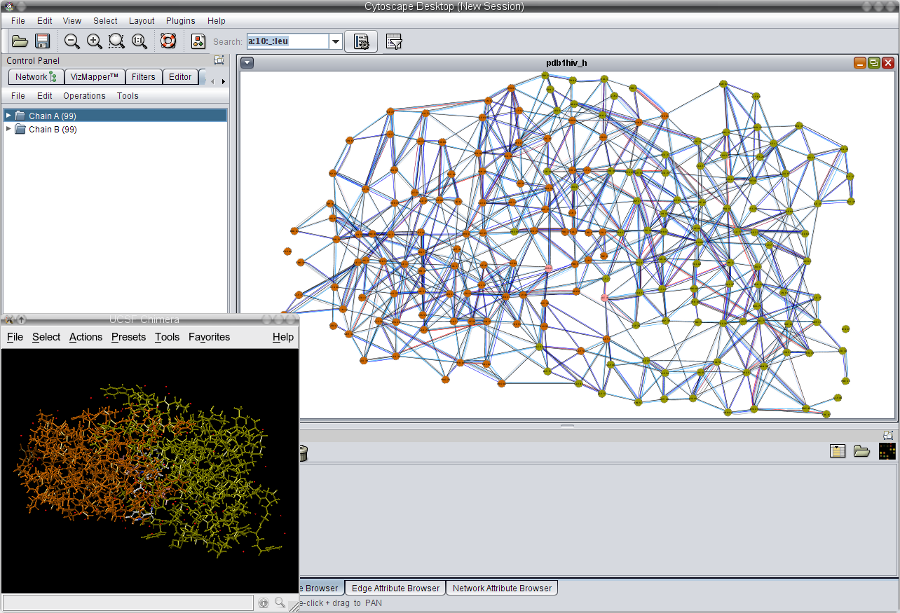 .
.
Discover and highlight active site residues
- From the literature we know that the active site residues of the HIV-1 protease are ASP 25, THR 26, and GLY 27 either in chain A or in chain B. Thus, we will create a set with all 6 residues.
- In the RINalyzer Node Sets panel in Cytoscape, go to File → New → Empty set (image
 ).
).
- Enter the name Active site and click OK (image
 ).
).
- Go to the Search field in the Cytoscape menu bar, in order to select the nodes representing the active site residues. Enter a:25 and you will see one hit, which is exactly the node we want to select. Press Enter (image
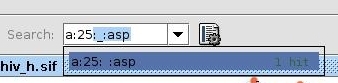 ).
).
- In the RINalyzer Node Sets panel, go to Edit → Add nodes (image
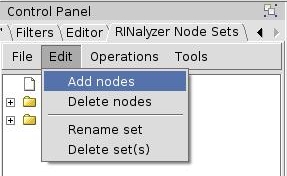 ) and the selected node will be added to the currently selected node set, which is Active site.
- Repeat these actions for the other 5 active site residues.
- The set Active site should contain 6 nodes (image
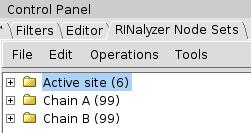 ).
).
- Right-click the set Active site and go to Visual Mapping Bypass → Node Color (image
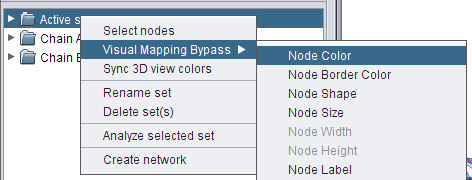 ).
).
- Select a color different from the previously chosen colors and click OK (image
 ).
).
- In the Cytoscape menu bar, click the 1:1 icon to see the whole network (image
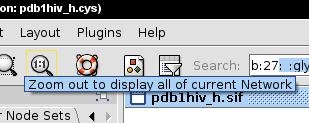 ).
).
- Right-click the set Active site and go to Select nodes (image
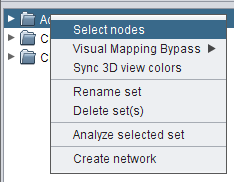 ). Switch to the UCSF Chimera window and you will see exactly where the active site residues of the HIV-1 protease are located (image
 ).
).
Save node sets
- Select all sets by left-clicking and pressing the Ctrl key (image
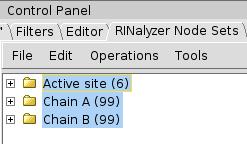 ).
).
- In the RINalyzer Node Sets panel, go to File → Save selected set(s) (image
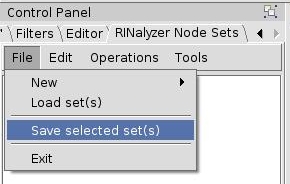 ).
).
- Enter the file name into the file browser, e.g., hiv1_sets and click on the Save button (image
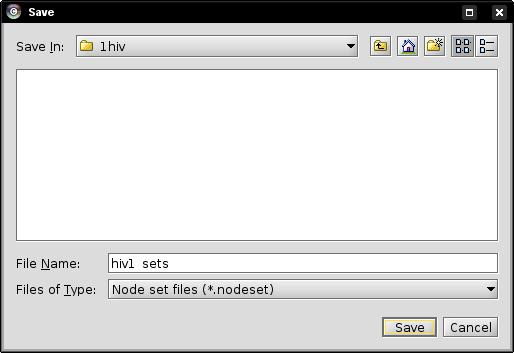 ).
).
- Close the dialog informing you about the successfully performed action (image
 ).
).